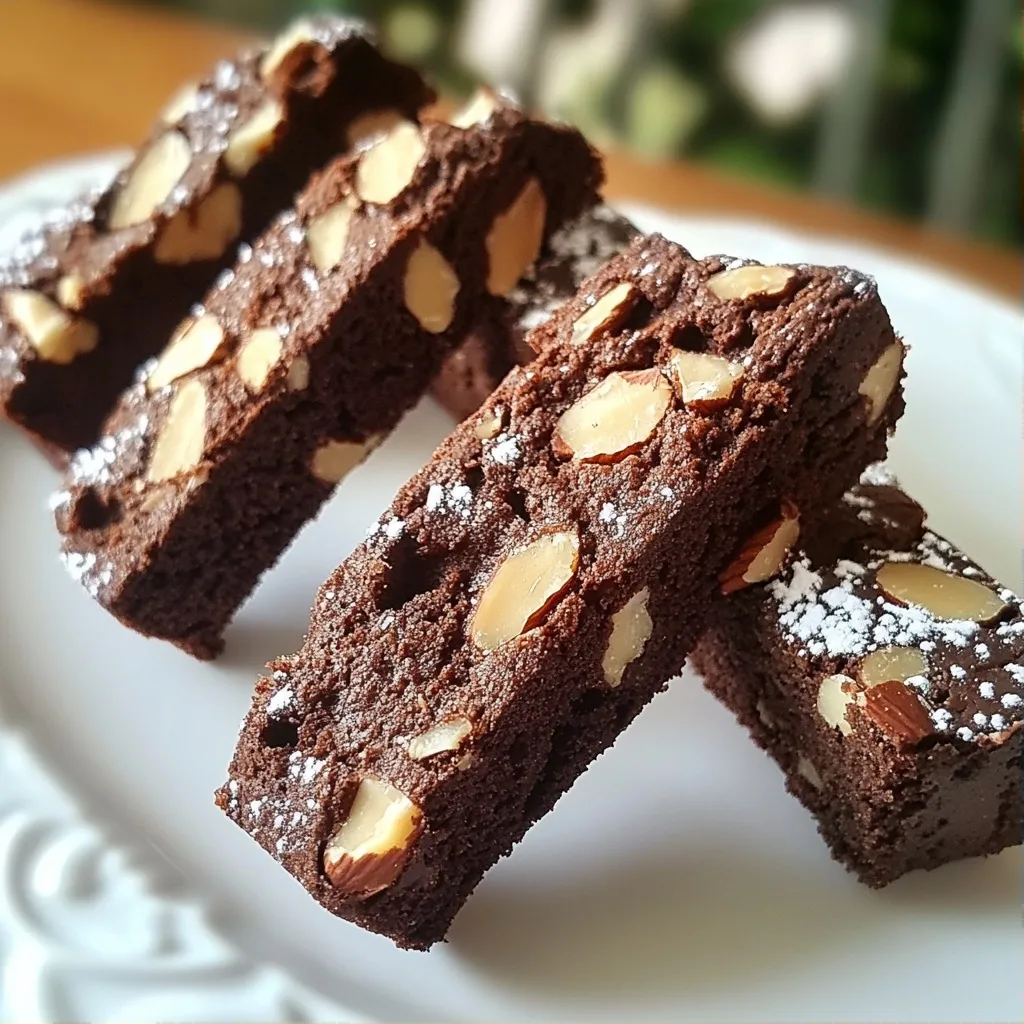
If you love sweet treats and crispy snacks, you’re in for a real treat! Today, I’m sharing my delicious air fryer recipe for Chocolate Almond Biscotti. These crunchy, chocolatey delights are simple to make and perfect for dipping in your favorite coffee or tea. Trust me, there’s nothing quite like the rich taste of homemade biscotti. Let’s dive into the ingredients and get started on this tasty adventure!
Why I Love This Recipe
- Decadent Flavor: The rich combination of chocolate and almonds creates a delightful treat that's perfect for any sweet tooth.
- Crunchy Texture: Biscotti offers a satisfying crunch, making it ideal for dipping into coffee or tea.
- Easy to Make: With simple ingredients and straightforward steps, this recipe is beginner-friendly and quick to prepare.
- Perfect for Sharing: These biscotti make a wonderful gift or party treat, sure to impress friends and family.
Ingredients
List of Ingredients
- 1 cup all-purpose flour
- 1/2 cup unsweetened cocoa powder
- 1 teaspoon baking powder
- 1/4 teaspoon salt
- 1/2 cup granulated sugar
- 1/4 cup brown sugar, packed
- 2 large eggs
- 1 teaspoon vanilla extract
- 3/4 cup roasted almonds, chopped
- 1/2 cup dark chocolate chips
- Optional: Powdered sugar for dusting
To make Chocolate Almond Biscotti, you will need some basic ingredients. First, gather all-purpose flour and unsweetened cocoa powder. These two add structure and rich flavor. Baking powder and salt help the biscotti rise and balance the taste.
Next, you need both granulated and brown sugar. They add sweetness and a nice texture. Eggs help bind everything together, while vanilla extract gives a lovely aroma.
Chopped roasted almonds bring a delightful crunch. Lastly, dark chocolate chips add a rich, melty touch. If you want, you can dust your biscotti with powdered sugar. This adds a sweet finish and makes them look fancy.
With these ingredients, you can create a delicious treat that pairs well with coffee or tea. Enjoy your baking adventure!
Step-by-Step Instructions
Preheat the Air Fryer
Set your air fryer to 320°F (160°C). Preheating helps cook the biscotti evenly. It ensures a perfect start for your baking.
Prepare the Dry Ingredients
In a medium bowl, mix together:
- 1 cup all-purpose flour
- 1/2 cup unsweetened cocoa powder
- 1 teaspoon baking powder
- 1/4 teaspoon salt
Whisk these dry ingredients until they blend well. This step adds structure to your biscotti.
Combine Wet Ingredients
In a large bowl, beat together:
- 1/2 cup granulated sugar
- 1/4 cup brown sugar, packed
- 2 large eggs
- 1 teaspoon vanilla extract
Use a hand mixer or whisk until creamy. This mixture adds moisture and flavor.
Forming the Dough
Gradually add the dry ingredients to the wet mix. Stir until just combined. Then fold in:
- 3/4 cup roasted almonds, chopped
- 1/2 cup dark chocolate chips
Gently mix until the nuts and chips are evenly spread in the dough.
Shaping the Biscotti Log
Shape the dough into a log about 12 inches long and 2 to 3 inches wide. Make sure it is compact. This helps it cook through evenly.
Cooking Time and Techniques
Place the log carefully in the preheated air fryer basket. Cook for 18 to 20 minutes. Check that it feels firm, not soft in the center. Let it cool for about 10 minutes. Then, slice it diagonally into 1/2-inch pieces.
Final Air Frying for Crispiness
Arrange the slices upright in the air fryer basket. Air fry for an additional 5 to 7 minutes. This step gives your biscotti that perfect crispy texture you love.
Tips & Tricks
Ensuring Perfect Biscotti Texture
To achieve the ideal firmness, start with well-measured ingredients. Use a kitchen scale for accuracy. Mix the dough until it is just combined. Overmixing can lead to tough biscotti. Shape the log tightly, so it holds its form during cooking. When you first cook it, it should feel firm to the touch. If it feels soft, it needs more time.
Storing Biscotti
To keep your biscotti fresh, allow them to cool completely. Store them in an airtight container. Glass jars or plastic containers work well. Keep the container in a cool, dry place. This will help maintain their crispness. They can last up to two weeks if stored properly.
Dusting with Powdered Sugar
For the best dusting, wait until the biscotti are cool. This prevents the sugar from melting. Use a fine mesh sieve for an even sprinkle. Dusting right before serving adds a nice touch. It also enhances the look of your biscotti. Enjoy the sweet finish it brings!
Pro Tips
- Use Quality Ingredients: The flavor of your biscotti will greatly depend on the quality of your cocoa powder and chocolate chips. Opt for high-quality brands for the best taste.
- Adjusting Sweetness: If you prefer your biscotti less sweet, feel free to reduce the amount of granulated and brown sugar by a couple of tablespoons.
- Storage Tips: Store your biscotti in an airtight container at room temperature for up to two weeks to maintain their crispness.
- Experiment with Nuts: While almonds are delicious, try substituting with other nuts like hazelnuts or pecans for a unique flavor twist!
Variations
Nut Substitutions
You can switch out almonds for other nuts. Try pistachios or walnuts for a new taste. Each nut brings a unique flavor. This way, you can make the biscotti your own. Just chop them up like you did with the almonds.
Flavor Enhancements
Add spices or flavored extracts to make your biscotti special. Cinnamon or nutmeg can give warmth. Almond or orange extract can add a fun twist. Use about a teaspoon for the best flavor without overpowering the chocolate. It’s a small change that can make a big difference.
Chocolate Options
You can choose between dark and milk chocolate. Dark chocolate gives a rich taste, while milk chocolate is sweeter and creamier. You can even mix them for a balance. Use chips or chunks depending on your preference. Either way, your biscotti will be a hit!
Storage Info
Shelf Life of Biscotti
Biscotti can last up to two weeks at room temperature. Store them in an airtight container. Keep them away from heat or moisture. This prevents them from becoming soft or stale.
Freezing Biscotti
To freeze biscotti, follow these steps:
- Allow them to cool completely.
- Place biscotti in a single layer in a freezer bag.
- Squeeze out as much air as possible.
- Seal tightly and label with the date.
To thaw, take them out and let them sit at room temperature for about 30 minutes. They will taste fresh again!
Best Containers for Storage
Use an airtight container for the best storage. Glass or plastic containers work well. You can also use resealable bags. Make sure they are sealed tightly to keep the biscotti crispy. Keep them in a cool, dark place for optimal freshness.
FAQs
How do I know when my biscotti is done?
To check if your biscotti is done, look for a firm texture. It should feel hard to the touch without any soft spots. You can also insert a toothpick; it should come out clean. The edges may turn a light golden brown, which is a good sign that they are ready.
Can I make this recipe gluten-free?
Yes, you can make this recipe gluten-free! Use gluten-free all-purpose flour as a substitute. Make sure it contains xanthan gum, which helps with texture. Almond flour is another great option, but you might need to adjust the liquid in the recipe.
What can I serve with Chocolate Almond Biscotti?
Chocolate almond biscotti pairs well with coffee or tea. Try a rich espresso or a warm chai latte for a cozy treat. You can also serve them with a glass of dessert wine or even hot chocolate for a sweet pairing.
How can I modify the sweetness of the biscotti?
To adjust the sweetness, you can reduce the sugar in the recipe. Start by cutting down the granulated sugar by a couple of tablespoons. If you want it sweeter, add a few more chocolate chips or a sprinkle of sugar on top before baking.
This blog post covered a simple and tasty recipe for Chocolate Almond Biscotti. You learned about each ingredient, from flour to chocolate chips. I shared easy steps to prepare, cook, and crisp your biscotti in an air fryer. You also got tips for variations and storage.
Enjoy making these treats! With a few tweaks, you can customize them to fit your taste. Baking can be fun, so get creative in the kitchen!